What is roof flashing?
Is roof flashing a necessity for homes? It is, but before we talk about why, we’re going to answer the question “What does roof flashing mean?” Any time you have a new roof installed or any roof repairs done, you want to make sure roof flashing installation is included.
Types of Roof Flashing
First and foremost, there isn’t just ‘roof flashing’ to think about; there are different types of roof flashing that your home should have, including the following:
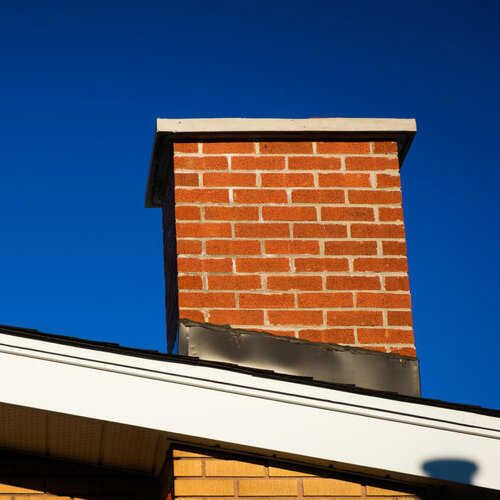
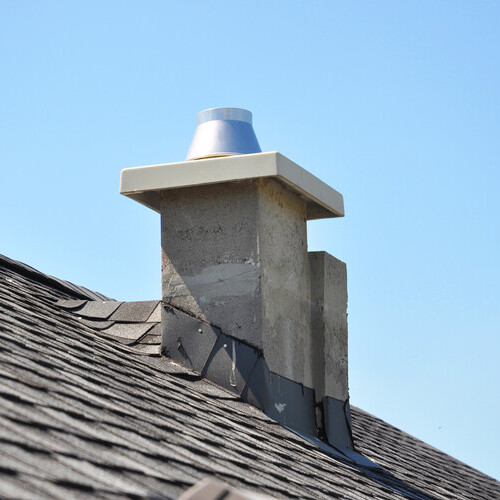
CHIMNEY AND COUNTER ROOF FLASHING INSTALLATION
Chimney and counter roof flashing installation is put on brick or masonry walls above the roof. This roof flashing redirects water to flow away, preventing leaks. They overlap to keep the water from getting behind and under the top flashing layer and working its way into the house.
STEP ROOF FLASHING INSTALLATION
Step roof flashing installation’s purpose is to keep water from penetrating the walls. Step roof flashing will shed water; it is a pre-painted metal that extends a minimum of two inches, directing the water to the gutter run. Step flashing is used with counter flashing to protect areas that the counter flashing doesn’t.
APRON OR HEADWALL ROOF FLASHING INSTALLATION
Apron or headwall roof flashing is installed along the intersection of vertical walls to guide water away and prevent it from running down the wall and onto the roofing system. Apron or headwall flashing is typically installed behind siding or in conjunction with counter flashing where brick is present. It is important that a roofing contractor installing a metal roof knows how to install roof flashing against a wall to prevent future leaks.
VALLEY ROOF FLASHING INSTALLATION
Valley roof flashing installation is where the roof system has changes in angles. An ice shield is installed along the center of the valley to give the roof more protection from ice and snow. It also prevents water from draining along the row of shingles and redirects it to the gutters.
GUTTER APRON ROOF FLASHING INSTALLATION
Gutter apron roof flashing installation is placed along the line of the gutter where the gutter and roof meet, where there is a gap between the fascia trim board and roof decking. The gutter apron roof flashing has a drip edge to prevent water from draining onto other components. This roof flashing directs water to the gutters and protects the attic from animals, insects, and the weather.
Is roof flashing required by code?
Yes, according to building codes R903-2 Flashing and R903.2. For locations in Canton, Georgia, roof flashing installation is required to provide moisture prevention in walls through intersections, joints, permeable materials, and other penetrations of the roof plane. Roof flashing installation is required where the roof and walls intersect, the roof slope direction changes, and along roof openings. Roof flashing installation will divert water away from the eaves and vertical sidewall intersections. It should be constructed of a metal that is non-corroding and no thinner than 0.5 mm.
What is the best roof flashing material?
Whether you’re getting your roof repaired from the storms that come through Georgia, or a new roof installed, there are a few different types of roof flashing installation. It can be important to choose the right material that gets the job done as well as fits your budget. The more common materials for roof flashing installation are:
- Aluminum: The most popular of all roof flashing installation materials because of the affordable pricing and durability.
- Copper: The most expensive material option for roof flashing installation, it is also the strongest and provides a pop of eye catching curb appeal.
- Membrane: For a drastic and different look compared to metal options, this material comes on a roll and can be used on areas other than the roof, like windows. It’s also a cost-effective option for protection against the elements.
How do you install flashing on an existing roof?
A roofing contractor experienced in metal roofing will know how to install flashing on a metal roof the proper way, but just in case you’re feeling handy and want to tackle your own roof flashing installation, you can review online videos on how to seal roof flashing and then follow these steps:
- The Rake Trim
Along the roofline is where the rake trim is installed. This is where the gable and roof line meet, and the end should be cut in an angle then folded to fit and meet the eave and end wall.
Butyl tape is needed on the underside of the nailed flange to provide a seal to keep moisture from intruding where the end panel and the trim meet. Using fasteners, you can align the new cut, angled, and folded trim to the roof line, spacing them no more than 24 inches apart.
- The Eave Trim
This roof trim keeps water away from the roof fascia, redirecting it to the ground. An underlayment should be installed first, then cut and folded, fitting the fascia and gable with a minimal angling. The screws used for eave trim roof flashing installation should be no more than 24 inches apart.
- The High Side Peak Trim
The roof flashing installation along at the high point prevents moisture from intruding under the sloping panels. This is installed by applying butyl tape as a sealant along the top of the panels. Next, along the outside closure above the tape, apply tube sealant. This peak trim should be cut at an angle and folded to fit at the closure top and the end rake trim. After the trim is in place, fasteners should be applied along the top.
In Closing
For the homeowner that is handy and interested in DIY roof flashing installation, knowing how to repair roof flashing should also be easy to learn. It is basically a matter of removing the existing flashing and replacing it with new material. It can be repaired with butyl tape if it has simply come loose and can be reinstalled.